


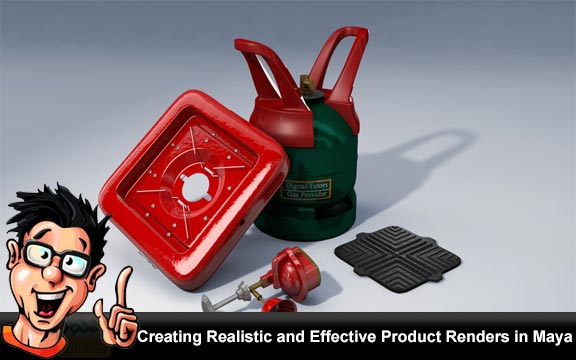
فیلم آموزشی Creating Realistic and Effective Product Renders in Maya ، آموزش طراحی واقعی و موثر رندر پروژه در نرم افزار مایا می باشد که برای افزایش سرعت کار با این نرم افزار توسط شرکت Digital Tutors تهیه و در اختیار علاقمندان قرار گرفته است . در این فیلم آموزشی شما با تکنیک های مدل سازی محصول ، نورپردازی موثر ، سایه و رندرینگ آشنا می شوید . Mauro Sanna در فیلم آموزشی Creating Realistic and Effective Product Renders in Maya کار خود را با توضیحاتی درباره پروژه آغاز می کند و در ادامه به بیان نگاهی گذرا به کلید های میانبر ، بدنه اصلی ، اضافه کردن هندسه برای به حداقل رساندن کشش ، اضافه کردن ضخامت به شی دیسک شکل ، رفع مشکلات و حفظ شکل استوانه ، ساخت بدنه اصلی کپسول گاز و بسیاری موارد دیگر که در این راستا می تواند به شما کمک کند خواهد پرداخت تا شما با استفاده از این تکنیک ها بتوانید در وقت خود صرفه جویی کرده و به بهترین طراحی دست یابید . همچنین شما می توانید با استفاده از پروژه تمرینی موجود در این دوره همزمان با دیدن فیلم آموزشی ، تمامی مباحث را بصورت عملی انجام دهید .

مباحث این دوره آموزشی :
001. Introduction and project overview
002. Overview of the plugins
003. Brief explanation of the two plugins
004. A quick look at shortcuts
005. Overview of the project reference photos
006. Beginning the first part of the main body
007. Continuing to build the gas bottle main body
008. Combining some parts of the gas bottle main body
009. Using the bevel and extrude tools
010. Using the extrude edge tool
011. Continuing the build of the gas bottle
012. Fixing problems and keeping the cylindrical shape
013. Using the duplicate special function
014. Using a reference object to better shape the base
015. Tweaking the gas bottle base
016. Adding some thickness to the base
017. Adding details to the gas bottle main body
018. Building the disc shaped object on the gas bottle
019. Adding more geometry to minimize stretching
020. Adding thickness to the disc shaped object
021. First attempt to finishing the disc shaped object
022. Refining the gas bottle neck
023. Adding the first bolt
024. Using the fillet tool
025. Blocking the base shape of the regulator base
026. Continuing the build of the gas regulator base
027. Adding geometry to the base of the regulator
028. Adding details to the base of the regulator
029. Finishing the first part of the base
030. Blocking out the shapes of the spherical part
031. Tweaking the cylindrical object
032. Refining and finishing the cylindrical object
033. Continuing the rectangular object of the regulator
034. Finishing the rectangular object
035. Shaping out the ring object
036. Finishing the ring object
037. Adding two spherical bolts
038. Finishing and grouping the knob
039. Beginning the second group
040. Continuing the pipes and bolts
041. Beginning the bell that covers the pipes
042. Finishing the bell shaped object
043. Modeling the flame cooker
044. Modeling the metal holder
045. Beginning the second bell shaped object
046. Beginning the second knob
047. Finishing the second knob
048. Tweaking and reorganizing what we built so far
049. Using the slide edge tool.
050. Continuing the build of the gas bottle handles
051. Using the bend deformer to achieve the arch shape
052. Refining the gas bottle handles
053. Refining the handle base
054. Finishing the build of the gas bottle handles
055. Beginning of the metal container modeling
056. Adapting the bottom part topology
057. Shaping out an indent
058. Cutting the hole of the metal container
059. Tweaking the vertices’ position
060. Extruding the small step out of the hole border
061. Finishing the internal part of the container
062. Beginning to carve the side holes
063. Refine the holes shape by using the split tools
064. Continuing the build of the metal container
065. Extruding the flaps out of the main bottom
066. Finishing the bottom shell
067. Modeling the first group of bolts
068. Beginning the metal arms holders
069. Giving the holders the correct shape
070. Finishing the metal arms holders
071. Refining the bolt positions
072. Finishing one grill metal holder
073. Beginning to build the metal arms
074. Using the extrude surface tool
075. Finishing the model of metal arms.
076. Beginning of the stone plate grill modeling
077. Beginning its surface pattern.
078. Finishing the modeling of the grill pattern
079. Tidying up the scene
080. Continuing the UV mapping
081. Fixing the stretching of the gas bottle
082. Finishing the UV mapping process
083. Doing the UV maps for the flame cooker
084. Setting up our scene for render and lighting
085. Beginning to move the objects into position
086. Finishing the composition and camera position
087. Key light, fill light and light linking
088. Fixing some unused and empty nodes problems
089. Adding a rim light and finishing the lights set up
090. Activating the color correction and tweaking lights
091. Finishing the lighting
092. IBL node, final gather, and gamma correction
093. Shading the handles and the red metal parts
094. Shading the golden metal parts
095. Continuing the shader of the metal container
096. Shading the chrome metal parts
097. Continuing the shaders creation
098. Creating the shaders for the stone plate
099. UV mapping the grill stone plate and pattern
100. Finishing the pattern Uvs
101. Test rendering and trying the texture
102. Beginning the cooker textures
103. Continuing the textures of the cooker
104. Introducing the layered texture node.
105. Texturing the metal with a fractal noise node
106. UV mapping of the metal container
107. Finishing the UV mapping of the metal container
108. Tweaking some values
109. Changing the shader of the cooker parts
110. Setting up render layers
111. Tweaking the render settings
112. Beginning to composite our render
113. Finalizing our image
مشخصات دیگر فیلم آموزشی فیلم آموزشی Creating Realistic and Effective Product Renders in Maya :
– ژانر : آموزشی
– شرکت سازنده : Digital Tutors
– مدرس : Mauro Sanna
– مدت زمان آموزش : 18 ساعت و 12 دقیقه
– پروژه ی تمرینی : دارد
– زبان : انگلیسی
– کیفیت نمایش : 720 * 1280
– فرمت فایل : mp4
– زیرنویس فارسی : ندارد

لینک دانلود

آروزی موفقیت و رستگاری موفق باشید.
اکثر پستهای شما مثلا همین پست های که آموزش مکس و مایا هست
من چند تا آموزش مکس و مایا که تو این 3 هفته اخیر گذاشتید دانلود کردم حجم کل شون 18 گیگ شد اما وقتی فایلها رو از حالت زیپ در آوردم شدن 13 گیگ و جالبه که وقتی با وین رار از حالت زیپ درشون می آوردم هیچ اروری نمیداد.
فقط سوالم این که چرا وقتی فایل استخراج میشه حجمش کمتر از زمانیه که دانلود میکنی؟!
سلام دوست عزیز ما 5% Recovery Mode روی فایل ها قرار میدیم که زمان دانلود اگه به مشکل خوردید بتونید repair کنید به این دلیل حجم کمی بالاتر می رود.
سلام
من یک فایل با حجم 1400 مگابایت دانلود کردم از اینجا وقتی که از حالت زیپ خارج کردم حجمش شد 770 مگابایت چرا اینجوریه؟؟!!
سلام
کدوم پست ؟ کدوم پارت ؟
کامل توضیح بدید تا مشکل رو برطرف کنیم .